Camp Kitchen Organization: Zones, Bins, and Table Flow
Camp kitchen organization is about zones and bins, not a longer gear list. Here is how to keep prep, heat, and wash moving without clutter.
By Alex Turner
Campsidepicks is reader-supported. As an Amazon Associate we earn from qualifying purchases. Learn more.
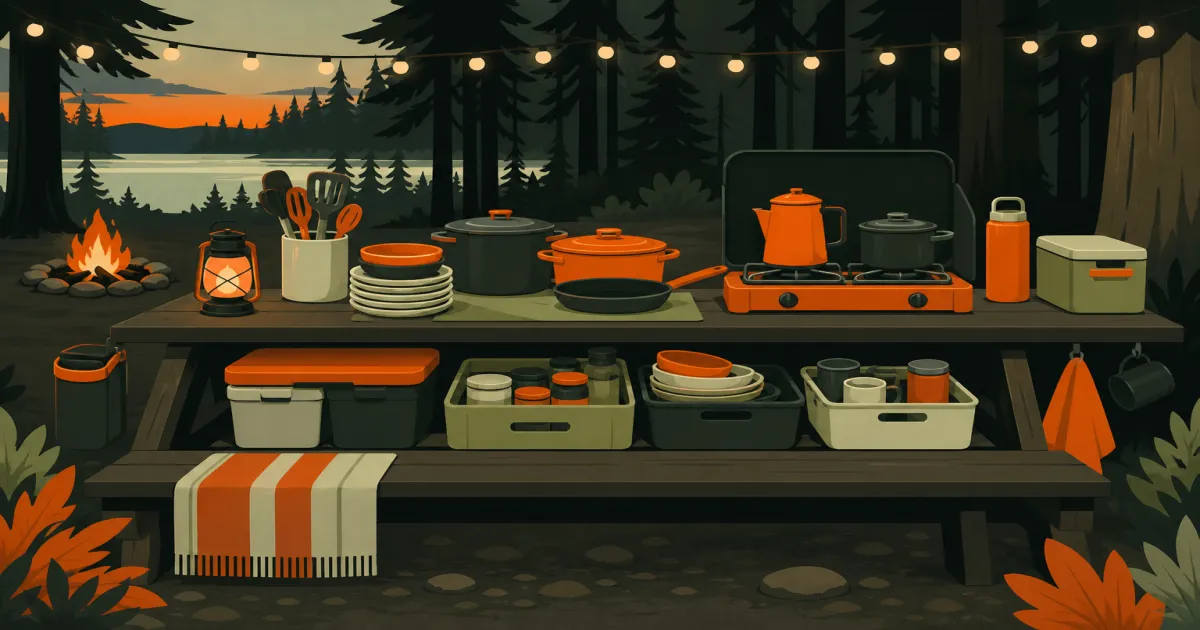
The short answer: Good camp kitchen organization means fixed zones on the table, labeled bins that match those zones, and a left-to-right flow from prep to heat to wash. Layout beats buying more gadgets.
A messy camp kitchen is not a character flaw. It is usually missing homes for pots, utensils, and dirty plates. Once everything lands on the same square of picnic table, dinner slows down and cleanup gets skipped.
This post is about systems: where things live and how they move. For physical layout of table, stove, and wash station, use our campsite kitchen setup guide. For nesting pots that pack cleanly, see best camping pot set. For scrub habits after meals, read how to clean camping cookware.
Zones first, then bins
Start with three jobs, not a product list. Prep holds the cutting board, knife, oil, spices, and dry towels. Cook holds the stove, fuel, lighter backup, pots, and lids. Wash holds bins or collapsible sinks, soap, sponge, scraper, and trash bags.
Each job needs a fixed slice of table. Mark it mentally on trip one. On trip two, it becomes muscle memory. When prep tools drift into the stove zone, people reach over flame for the salt. That is how burns and tip-overs happen.
If the picnic table is shared with cards and headlamps, claim one half as kitchen-only. Personal clutter belongs on the other half or in the tent vestibule.
Bin labels that match the zones
Bins only help if they map to the same three jobs. Label them at home with tape or vinyl so setup is automatic after dark. A “cook” bin holds nested pots, stove, fuel, and utensils. A “wash” bin holds soap, sponge, scraper, and spare trash bags. A “dry goods” or “food” bin holds spices, oil, coffee kit, and snacks.
Soft pouches inside bins catch the small stuff: can opener, tongs, matches, thermometer. Zip pouches beat digging through loose metal every morning.
Nest cookware the same way every time. Lid on the bottom of the stack or on top, always. Consistency is half of organization. Random nesting is how lids disappear under the seats.
Table flow that keeps heat safe
Think left to right (or right to left if that matches your dominant hand). Raw prep on one end. Stove in the middle with clearance. Wash on the far end. Finished plates move toward wash, not back through prep.
Leave a clear foot beside the stove so pot handles do not hang off the edge. Fuel stays upright and away from the flame. Wind screens belong behind the burner if the site is gusty, not jammed against a canister.
Coffee gear can sit on a corner shelf or the prep end. Do not build a second “stove island” out of mugs and French presses in the middle of the flame zone. Morning rush is when people bump hot pots.
Daily reset after each meal
Organization fails when dirty dishes become the new tabletop. Scrape plates into trash first. Wash soon while residue is soft. Dry pots before they go back in the cook bin. A damp sponge sealed next to nesting pots smells by Saturday.
Assign a two-minute reset: wipe the prep surface, return utensils to the pouch, and bag trash. That is enough to keep breakfast from starting in last night’s crumbs.
If water is limited, still scrape and wipe. Finish a deeper clean at home. Organization is about keeping the system usable, not about restaurant-level sparkle every night.
Solo vs couple vs group systems
Solo campers can run one cook bin and one wash pouch. The whole kitchen deploys in five minutes. Keep spices and oil in a small dry pouch nested with pots so you are not hunting three bags at dawn.
Couples benefit from separate cook and wash bins plus a shared food tote. One person owns prep while the other owns heat. Clear jobs reduce the “where is the spatula” loop.
Groups need a labeled grab zone for cups and snacks away from burners. Put dish duty on a rotation before dinner starts. Shared kitchens stay organized when cleanup is assigned, not assumed.
| Trip size | Core bins | Extra |
|---|---|---|
| Solo | 1 cook + wash pouch | Coffee in cook bin |
| Couple | Cook, wash, food | Utensil pouch |
| Group (4+) | Cook, wash, food, trash | Grab pouch for kids |
Common organization mistakes
One giant mystery tote. Everything fits, nothing is findable. Split by zone.
Soap loose with pots. Leaks ruin nesting and flavor tomorrow’s coffee. Seal wash gear.
Using the stove zone as storage. Grocery bags and lanterns crowd flame. Clear that strip first.
No trash plan. Wrappers and grounds pile on the prep board. Tie a bag to a table leg before you cook.
Repacking wet. Moisture in a closed cook bin turns into mildew. Air-dry or bag wet items separately.
Buying organizers before fixing flow. A hanging rack will not save a table with no wash end. Fix zones first.
Packing order that matches setup
Pack heavy items low: stove, fuel, pots. Soft items on top: towels, cutting board, pouches. At the site, deploy table claim, then cook bin, then wash, then food. Light the stove last.
On pack-out, reverse the order. Wash gear goes in last so it is first out next trip if something still smells damp. Shake crumbs from bins before the drive home.
Practice once in the driveway. If you cannot find the spatula without unpacking the whole tote, relabel before the campground.
When to keep it simpler
Not every trip needs three rigid bins. A walk-in site with a short carry favors one nested cook kit and a fold-flat wash tub. Car camping with kids favors more labels and a grab pouch. Match complexity to how far you carry gear and how many people share the table.
If you are still choosing pots, lock a nesting set first. Organization is easier when lids and pans stack the same way every time. Our pot set guide covers that choice without turning this page into a shopping list.
For more weekend camp kitchen habits and soft gear picks across stoves, cookware, and light, start at the Campsidepicks homepage and browse the sibling cookware guides from there.
Bottom line
Camp kitchen organization is zones, matching bins, and a prep-cook-wash flow that keeps flame clear. Label once at home. Reset after each meal. Keep wash gear sealed away from nesting pots. The goal is a table you can cook on without excavating a tote every night.
Frequently Asked Questions
What is the simplest camp kitchen organization system?
Three zones on the table (prep, cook, wash) plus one labeled bin per zone. That covers most weekend car-camp meals without a rolling kitchen cart.
How many bins do I need?
Two bins work for solo trips (cook and wash). Couples usually want three: cookware, food and dry goods, and cleaning. Soft pouches inside bins keep small tools from wandering.
Should cookware live in the same bin as soap?
Keep soap and sponges in a sealed wash pouch, not loose next to pots. Wet cleaning gear ruins nesting and smells up the kit by day two.
Where does the cutting board go during dinner?
On the prep end of the table, not next to the stove. Hot pots and knives need separate real estate so handles do not hang over the flame.
How do I organize a shared kitchen with kids?
Put snacks and drink cups in a labeled “grab” pouch away from the stove zone. Kids can reach it without crossing the burner line.
Is a hanging organizer worth packing?
Only if your picnic table is tiny. Most car campers get more value from rigid bins that stack in the trunk and double as table-edge storage.